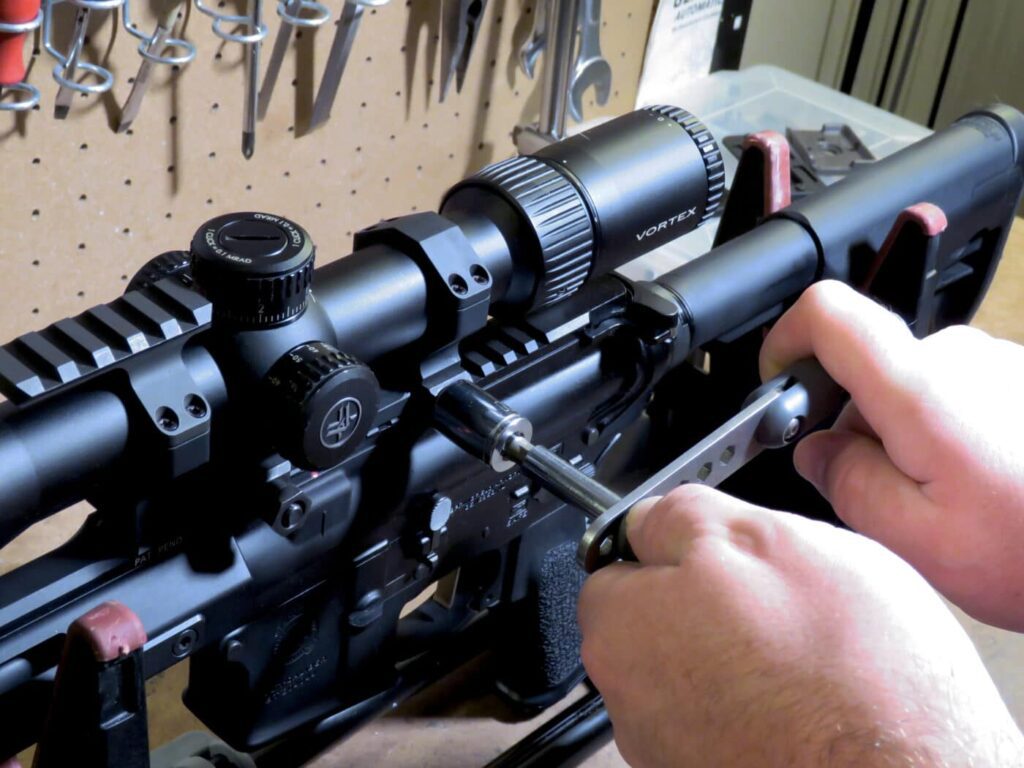
A properly installed rifle scope mount is crucial for achieving accurate and precise shots. Whether you’re a seasoned marksman or a novice shooter, installing a rifle scope mount can significantly enhance your shooting experience. In this step-by-step guide, we will walk you through the process of installing a rifle scope mount.
Table of Contents
Step 1: Gather Your Tools and Materials
Before embarking on the installation of a riflescope mount, it’s crucial to gather all the necessary tools and materials to ensure a smooth and efficient process. Having the right equipment on hand will not only make the installation easier but also help prevent potential complications that could arise from using improper tools. Here’s a comprehensive list of tools and materials you may need:
1. Screwdriver:
– Choose a screwdriver that matches the type of screws provided with your scope mount. This ensures a snug fit and prevents damage to the screw heads.
2. Torque Wrench:
– A torque wrench is essential for tightening the screws to the manufacturer’s specifications. This precision tool helps avoid over-tightening, which could potentially damage the scope mount or the rifle.
3. Scope Mount Kit:
– Make sure you have the complete scope mount kit that includes the mount itself, screws, and any additional components required for installation. Refer to the manufacturer’s instructions to confirm that all necessary parts are included.
4. Safety Glasses:
– Safety should always be a top priority when working with firearms. Wear protective safety glasses to shield your eyes from any debris or particles that may be dislodged during the installation process.
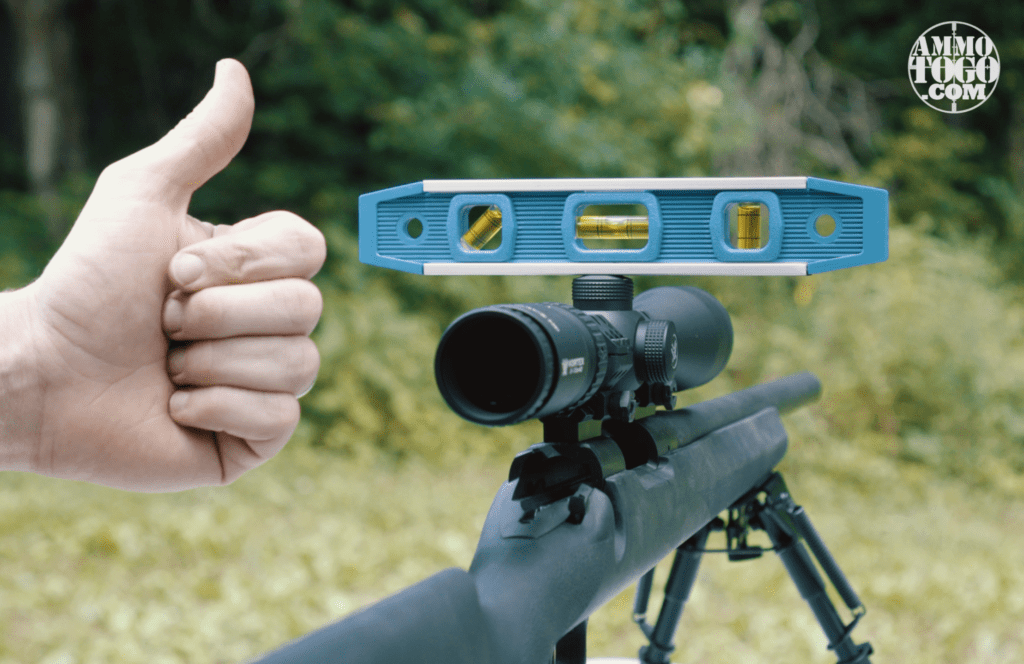
5. Bubble Level:
– A bubble level is essential for ensuring the scope is correctly aligned on both the horizontal and vertical axes. This tool helps guarantee that your shots will be accurate and consistent.
6. Clear Workspace:
– Before you begin, clear a well-lit and clutter-free workspace. This will give you ample room to work and minimize the risk of losing small components during the installation.
7. Gunsmithing Mat or Vise:
– To prevent scratches or damage to your firearm, consider using a gunsmithing mat or a vise. These tools provide a stable and padded surface for your rifle while you work on attaching the scope mount.
8. Allen Wrench Set (if applicable):
– Some scope mounts may use hexagonal screws that require an Allen wrench. Ensure you have the correct size of Allen wrench if needed for your specific mount.
10. Manufacturer’s Instructions:
– Always refer to the manufacturer’s instructions that come with the scope mount. These instructions provide specific guidance on the tools required, the installation process, and any unique considerations for your particular mount and firearm.
By gathering these tools and materials before starting the installation, you set yourself up for success and ensure that the process is both efficient and safe. Always prioritize safety and follow the manufacturer’s guidelines throughout the installation process.
Step 2: Ensure Safety When Installing Rifle Scope Mount
Ensuring safety is the paramount consideration when working with firearms, and installing a rifle scope mount is no exception. The process involves handling a potentially dangerous tool, and adherence to safety protocols is crucial to prevent accidents or injuries. Here’s a detailed guide on ensuring safety first during the installation of a rifle scope mount:
1. Unload the Firearm:
– Before beginning any work on the firearm, ensure that it is completely unloaded. Remove any ammunition from the chamber and check the magazine to confirm that it is empty. Treat every firearm as if it is loaded, and never assume its status without personally verifying.
2. Clear the Chamber:
– After removing the magazine, open the action and visually inspect the chamber to ensure there are no rounds present. Run your finger through the chamber to verify that it is clear. This step is critical for preventing accidental discharges.
3. Engage the Safety:
– If your firearm is equipped with a safety mechanism, engage it before starting the installation process. This adds an extra layer of protection against unintentional firing.
4. Wear Safety Glasses:
– Always wear safety glasses or protective eyewear during the installation. This precaution is essential to shield your eyes from any debris, metal shavings, or other particles that may be dislodged during the mounting process.
5. Use a Controlled Environment:
– Install in a controlled and well-ventilated environment. Avoid distractions and ensure that the area is free from other individuals who are not involved in the process. A dedicated workspace with proper lighting is ideal.
6. Keep Ammunition Separate:
– Keep all ammunition away from the workspace. Store it in a separate location to eliminate any chance of accidental loading during the installation. This step reinforces the importance of treating the firearm as if it is loaded at all times.
7. Follow Manufacturer’s Safety Guidelines:
– Adhere strictly to the safety guidelines provided by the firearm and scope mount manufacturers. These guidelines are designed to ensure safe handling and installation procedures specific to your equipment.
8. Know Your Firearm:
– Familiarize yourself with the specific safety features and mechanisms of your firearm. Different models may have unique safety systems, and understanding how they work is essential for safe handling.
9. Secure the Firearm:
– Consider using a rifle vise or gunsmithing mat to secure the firearm during the installation process. This provides a stable platform, reducing the risk of accidental slips or falls.
10. Work Methodically:
– Take your time and work methodically through each step of the installation process. Rushing increases the likelihood of errors, oversights, or accidents.
By prioritizing safety and adhering to these guidelines, you create a secure environment for installing a rifle scope mount. Remember that safety is a shared responsibility, and everyone involved in or around the installation process should be aware of and committed to following these safety protocols.
Step 3: Identify the Scope Mount and rifle Compatibility
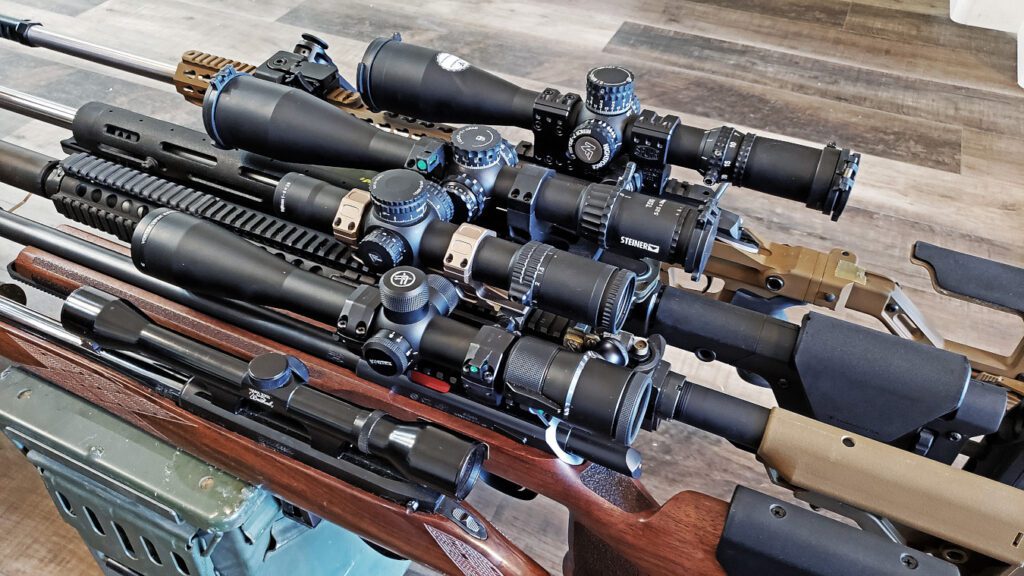
Identifying the compatibility between your chosen scope mount and the firearm is a crucial step in the process of installation. Not all scope mounts are universal, and ensuring a proper match is vital for achieving optimal performance and safety. Here’s a detailed guide on how to identify the scope mount and rifle compatibility:
1. Refer to Firearm Manufacturer’s Recommendations:
– Start by consulting the user manual or documentation provided by the manufacturer of your firearm. Often, firearm manufacturers provide recommendations or guidelines regarding compatible accessories, including scope mounts.
2. Check the Scope Mount Specifications:
– Examine the specifications provided by the scope mount manufacturer. This information is typically available in the product manual, packaging, or on the manufacturer’s website. Look for details such as the type of firearms the mount is designed for and any specific models it may be compatible with.
3. Verify Mount Type:
– Different firearms may require different types of mounts, such as Picatinny, Weaver, or specialized mounts designed for specific models. Verify that the mount you have is suitable for the rail system or mounting points on your firearm.
4. Consider Firearm Type:
– Some scope mounts are designed for specific types of firearms, such as rifles, shotguns, or handguns. Ensure that the mount is appropriate for the type of firearm you are working with.
5. Check for Model-Specific Considerations:
– Certain firearms may have model-specific considerations when it comes to scope mount compatibility. Check for any information provided by the firearm manufacturer or the scope mount manufacturer regarding compatibility with specific models.
6. Research Online Resources:
– Utilize online forums, reviews, and community discussions to gather insights from other firearm enthusiasts who may have experience with the same firearm and scope mount combination. Online resources can provide valuable real-world feedback on compatibility issues.
7. Contact Manufacturers or Retailers:
– If you are uncertain about the compatibility of your scope mount and firearm, reach out to the manufacturers or retailers for clarification. They can provide specific information and guidance based on the make and model of your firearm.
8. Consider Additional Features:
– Some firearms may have additional features, such as extended rails, that can affect the compatibility of a scope mount. Ensure that the mount accommodates any unique features or modifications on your firearm.
9. Inspect Mounting Points on the Firearm:
– Physically inspect the mounting points on your firearm, such as the Picatinny or Weaver rails. Ensure that the scope mount aligns with these points and that there are no obstructions or compatibility issues.
10. Seek Professional Advice:
– If you are unsure about the compatibility or installation process, consider seeking advice from a professional gunsmith. They can provide expert guidance and assistance, ensuring that the scope mount is installed correctly and safely.
By carefully considering the compatibility between your scope mount and firearm, you lay the foundation for a successful installation. Taking the time to verify these details helps avoid issues such as misalignment, instability, or damage to your firearm or scope. Always prioritize safety and follow the recommendations of both the firearm and scope mount manufacturers.
Step 4: Remove Existing Accessories
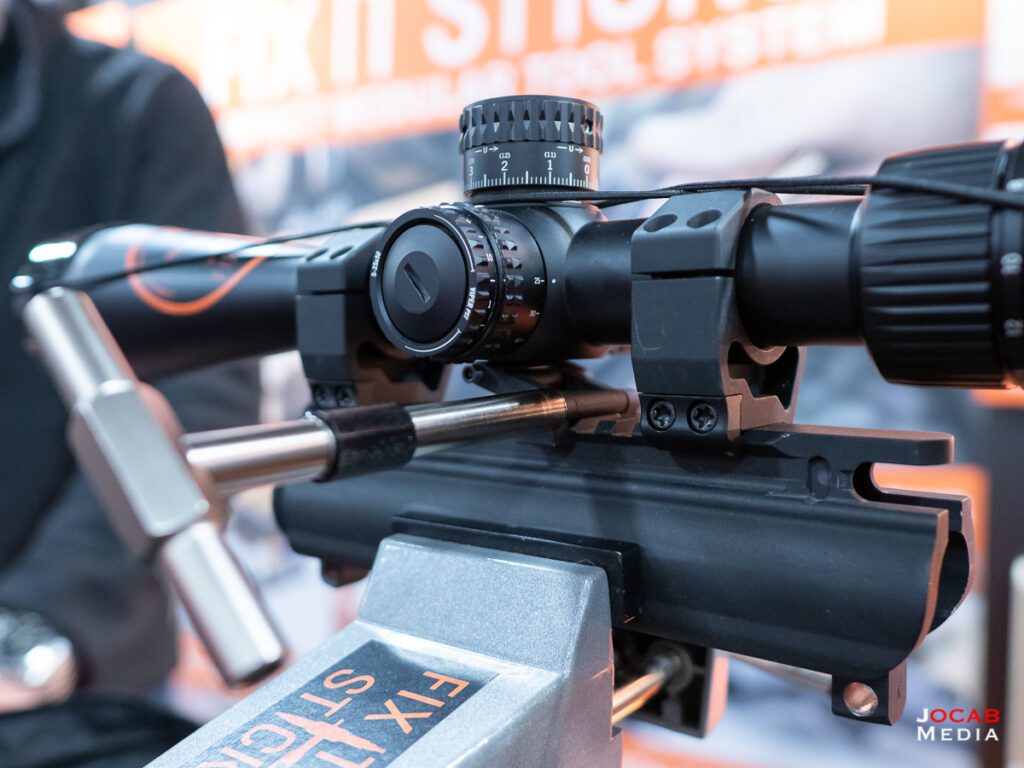
Removing existing accessories from your firearm before installing a scope mount is a crucial step to ensure a clean and unobstructed mounting surface. Whether your firearm has iron sights, red dot sights, or other optics, taking the time to remove them properly will pave the way for a successful scope mount installation. Here’s a step-by-step guide on how to remove existing accessories:
1. Ensure Firearm Safety:
– Before handling the firearm, follow proper safety protocols. Make sure the rifle is unloaded, the chamber is clear, and the safety is engaged. Wearing safety glasses is also recommended to protect your eyes during the removal process.
2. Refer to the Firearm Manual:
– Consult the user manual or documentation provided by the firearm manufacturer. Look for information on how to remove existing accessories and any specific instructions related to your firearm model.
3. Gather Necessary Tools:
– Identify the tools required for removing the existing accessories. Common tools may include screwdrivers, Allen wrenches, or other specialized tools depending on the type of accessories mounted on your firearm.
4. Unscrew Fasteners:
– Carefully unscrew the fasteners that secure the existing accessories to your firearm. Follow the specific instructions provided in the firearm manual or accessory documentation. Pay attention to the type and size of screws or bolts used.
5. Organize and Store Screws:
– As you remove screws or fasteners, organize them and store them in a safe place. This ensures that you can easily locate them when reassembling the firearm or if you decide to reattach the accessories later.
6. Use Proper Technique:
– When removing accessories, use the appropriate technique to avoid damaging any components. Some accessories may have specific removal steps, such as releasing tension mechanisms or unlocking levers. Refer to the manufacturer’s instructions for guidance.
7. Check for Additional Attachments:
– Some accessories may have additional attachments, such as shims or spacers. Take note of any extra components and keep them organized with the corresponding screws.
8. Inspect Mounting Surfaces:
– After removing the accessories, inspect the mounting surfaces on your firearm. Ensure that there are no residual debris, adhesive, or other materials that could interfere with the installation of the scope mount.
9. Clean Mounting Surfaces (if necessary):
– If needed, use a cleaning solution or solvent to clean the mounting surfaces. This ensures a clean and flat surface for the scope mount to be securely attached. Allow the surfaces to dry completely before proceeding.
10. Store Removed Accessories Safely:
– If you plan to reuse the removed accessories, store them in a safe and protected environment to prevent damage. Use labeled containers or bags to keep track of the various components.
By carefully removing existing accessories, you create a clean slate for installing the scope mount on your firearm. Following these steps helps prevent complications during the installation process and ensures that the scope mount can be securely and accurately attached to the firearm. Always prioritize safety and adhere to the manufacturer’s guidelines throughout the process.
Step 5: Align the Scope Mount
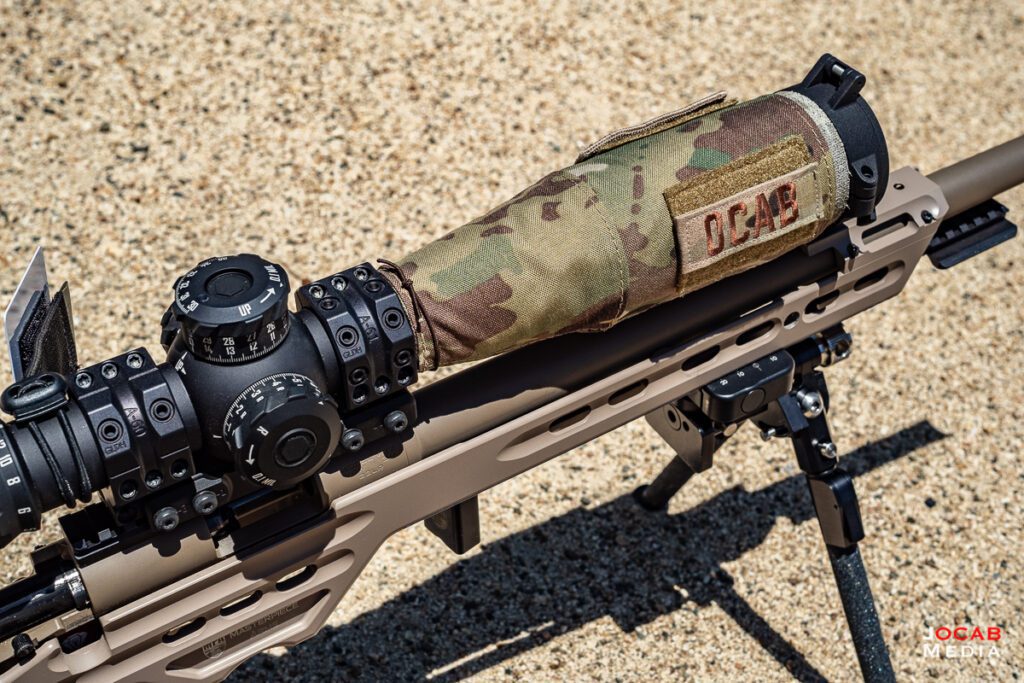
Aligning the scope mount is a critical step in the installation process to ensure the stability and accuracy of your firearm. Proper alignment is essential for achieving precise shots and maximizing the performance of your scope. Here’s a step-by-step guide on how to align the scope mount:
1. Secure the Firearm:
– Before aligning the scope mount, ensure that the firearm is securely placed on a stable surface. If available, use a rifle vise or gunsmithing mat to provide a secure platform for the firearm.
2. Refer to Manufacturer’s Instructions:
– Consult the manufacturer’s instructions provided with the scope mount. The instructions often include specific guidance on how to align the mount correctly for your particular firearm model.
3. Identify Mounting Points:
– Locate the designated mounting points on your firearm’s receiver. These are typically the Picatinny or Weaver rails. Ensure that the scope mount aligns with these points without any obstructions.
4. Position the Scope Mount:
– Place the scope mount on top of the firearm’s receiver, aligning it with the designated mounting points. Take care to position the mount evenly, ensuring that it sits flush and snug against the firearm.
5. Check for Proper Fit:
– Confirm that the scope mount fits securely on the firearm without any wobbling or movement. A proper fit is essential for stability, accuracy, and overall firearm performance.
6. Visual Alignment:
– Visually inspect the alignment of the scope mount. Ensure that it runs parallel to the barrel and is centered on the firearm. This visual check helps identify any immediate alignment issues.
7. Use a Straight Edge (Optional):
– For added precision, you can use a straight edge or ruler to confirm that the scope mount is aligned with the firearm’s axis. Place the straight edge along the top of the firearm, ensuring it aligns with the mount.
8. Make Adjustments as Needed:
– If the scope mount is not perfectly aligned, make necessary adjustments. Loosen the screws slightly and shift the mount until it aligns correctly. Use small, controlled movements to avoid over-adjusting.
9. Hand-Tighten Screws:
– Once the scope mount is properly aligned, hand-tighten the screws. This allows for easy adjustments if needed before finalizing the installation.
10. Check Alignment Again:
– Double-check the alignment after hand-tightening the screws. Ensure that the scope mount remains properly aligned. If adjustments are necessary, make them before proceeding to the final tightening.
11. Torque to Manufacturer’s Specifications:
– Use a torque wrench to tighten the screws to the torque specifications provided by the scope mount manufacturer. Be careful not to over-torque, as this can lead to damage.
12. Recheck Stability:
– Confirm the stability of the scope mount by gently applying pressure to ensure it remains securely in place. If there is any movement, reevaluate the alignment and tighten the screws accordingly.
By carefully aligning the scope mount with your firearm, you set the foundation for a successful installation and optimal performance of your scope. Regularly check and re-tighten the screws as needed to maintain stability over time. Always follow safety protocols and refer to the manufacturer’s instructions throughout the process.
Step 6: Insert Screws and Hand-Tighten
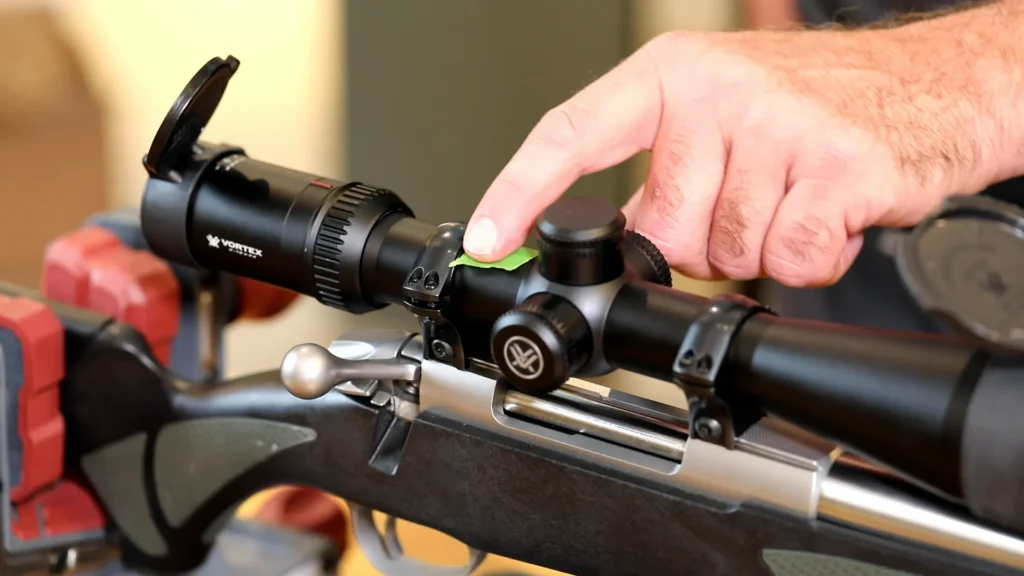
Inserting screws and hand-tightening them during the installation of a rifle scope mount is a crucial step to secure the mount in place before the final tightening with a torque wrench. Here’s a step-by-step guide on how to insert screws and hand-tighten them:
1. Ensure Firearm Safety:
– Before handling the firearm, follow proper safety protocols. Confirm that the rifle is unloaded, the chamber is clear, and the safety is engaged. Wear safety glasses to protect your eyes during the installation process.
2. Gather Necessary Tools:
– Ensure you have the appropriate screwdriver or tool for the screws provided with your scope mount. Confirm the correct size and type of screws by referring to the manufacturer’s instructions.
3. Identify Mounting Points:
– Locate the designated mounting points on your firearm’s receiver. These points are typically the Picatinny or Weaver rails. Ensure that the scope mount is positioned correctly, aligning with these mounting points.
4. Insert Screws:
– Carefully insert the screws into the designated holes on the scope mount. Use the appropriate screwdriver or tool to ensure a proper fit. Begin by loosely threading the screws into the mounting points.
5. Hand-Tighten Screws:
– Hand-tighten the screws until they are snug against the firearm’s receiver. Use a controlled and even force to avoid uneven tightening. Hand-tightening allows for adjustments before finalizing the installation.
6. Check for Proper Alignment:
– While hand-tightening, periodically check for proper alignment of the scope mount. Ensure that it remains flush against the firearm and aligned with the mounting points. If adjustments are needed, make them at this stage.
7. Verify Stability:
– Confirm the stability of the scope mount by gently applying pressure. The mount should not wobble or shift. If there is any movement, reevaluate the alignment and tighten the screws further as needed.
8. Inspect for Even Tightening:
– As you hand-tighten the screws, pay attention to ensure even tightening. Avoid over-tightening any specific screw before the others. This helps distribute pressure evenly across the mount.
9. Use a Cross-Pattern (Optional):
– When hand-tightening, consider using a cross-pattern to tighten the screws diagonally across the mount. This technique helps ensure uniform pressure distribution and can prevent misalignment.
10. Make Final Adjustments:
– Before proceeding to the final tightening with a torque wrench, make any necessary final adjustments to the alignment. If the scope mount has shifted during the hand-tightening process, address it now.
11. Confirm Hand-Tightening:
– Reconfirm that all screws are hand-tightened and that the scope mount is stable and aligned. This step ensures that the final tightening with the torque wrench is based on a solid foundation.
By carefully inserting screws and hand-tightening them, you establish the initial connection between the scope mount and the firearm. This step allows for adjustments and ensures proper alignment before the final torque is applied. Always follow safety protocols, refer to the manufacturer’s instructions, and maintain attention to detail throughout the installation process.
Step 7: Torque to Manufacturer’s Specifications
Torquing the screws to the manufacturer’s specifications is a critical step in the installation of a rifle scope mount. It ensures that the mount is securely attached to the firearm without the risk of over-tightening, which can lead to damage. Here’s a step-by-step guide on how to torque the screws to the manufacturer’s specifications:
1. Verify Screw Tightening Specifications:
– Refer to the manufacturer’s instructions provided with the scope mount. Look for the specified torque settings for each screw. This information is crucial for ensuring the proper tightness without causing damage.
2. Select the Correct Torque Wrench:
– Choose a torque wrench that is suitable for the torque specifications provided by the manufacturer. Ensure that the torque wrench is calibrated and in good working condition.
3. Insert Torque Wrench Bit:
– If your torque wrench uses interchangeable bits, insert the appropriate bit that matches the size and type of screws on the scope mount. Make sure it fits securely to prevent slippage during tightening.
4. Set the Torque Wrench to the Specified Setting:
– Adjust the torque wrench to the specified torque setting as indicated in the manufacturer’s instructions. Take care not to exceed the recommended torque, as over-tightening can lead to damage.
5. Tighten Screws in a Cross-Pattern:
– Start torquing the screws in a cross-pattern, alternating between screws diagonally across the mount. This technique helps distribute pressure evenly and ensures a balanced tightening sequence.
6. Apply Slow and Controlled Pressure:
– With the torque wrench set to the specified setting, apply slow and controlled pressure to each screw. Gradually tighten each screw in small increments until you reach the recommended torque.
7. Listen for the Click:
– Most torque wrenches are designed to emit an audible click when the specified torque is reached. Listen for this click, and stop tightening immediately. This ensures precision and prevents over-tightening.
8. Double-Check Tightness:
– After torquing all the screws, double-check their tightness using the torque wrench. Ensure that each screw has been tightened to the specified torque setting.
9. Inspect for Any Movement:
– Gently inspect the scope mount for any signs of movement or play. If there is any, reevaluate the torque on the affected screws and make adjustments as necessary.
10. Record Torque Settings (Optional):
– Optionally, record the torque settings used for each screw. This information can be valuable for future reference or if adjustments are needed later.
11. Reconfirm Stability:
– Reconfirm the stability of the scope mount by gently applying pressure. Ensure that the mount is securely attached to the firearm without any wobbling or shifting.
By torquing the screws to the manufacturer’s specifications, you ensure a secure and stable connection between the scope mount and the firearm. This step is critical for accuracy, reliability, and overall performance. Always follow safety protocols, use the appropriate tools, and refer to the manufacturer’s instructions throughout the installation process.
Step 8: Mount the Scope
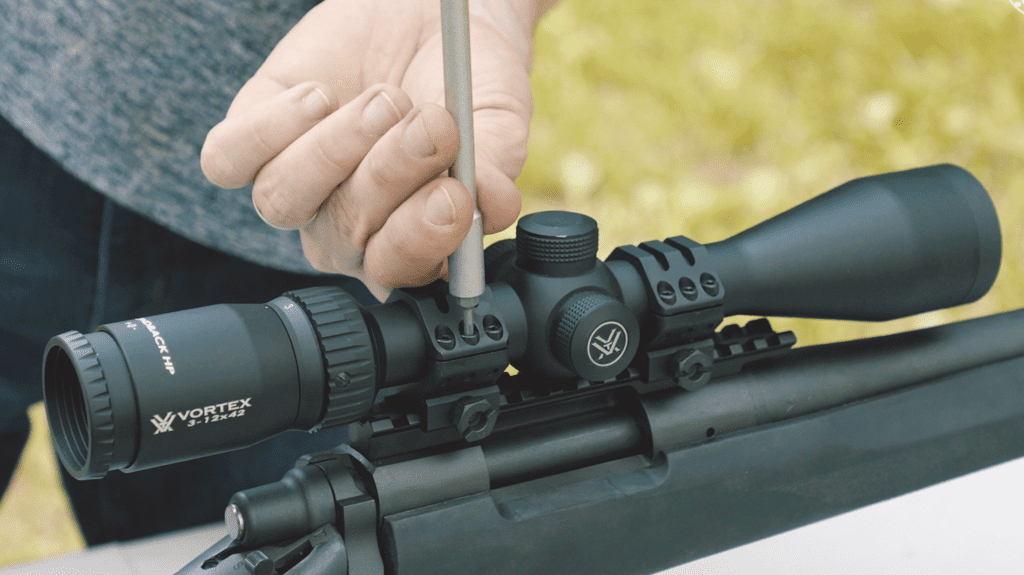
Mounting the scope onto the scope mount is the final step in the installation process, and it requires precision to ensure optimal accuracy and performance. Here’s a step-by-step guide on how to mount the scope onto the scope mount:
1. Prepare the Scope:
– Ensure that the scope is free from any lens caps or protective covers. Check that the windage and elevation turrets are set to their neutral or zero positions.
2. Inspect the Scope Rings:
– If your scope mount uses separate rings, inspect them for any defects or damage. Ensure that the rings are of the correct size and type for your scope.
3. Place the Scope into the Rings:
– Carefully place the scope into the scope rings, ensuring that it is centered and level. The scope should rest securely in the rings without any unnecessary movement.
4. Position the Scope Correctly:
– Adjust the position of the scope within the rings to achieve the desired eye relief and comfortable shooting position. Consult the scope’s manual for recommended eye relief specifications.
5. Check for Alignment:
– Verify that the reticle (crosshair) of the scope is aligned with the firearm’s bore. This ensures that your shots will be accurately directed to the point of aim.
6. Tighten Ring Screws Hand-Tight:
– Begin by hand-tightening the screws on the scope rings. This initial tightening allows for adjustments before finalizing the installation. Ensure that the scope remains aligned and centered during this process.
7. Level the Scope:
– Place a bubble level on the scope’s turret or another flat surface to ensure that the scope is level on both the horizontal and vertical axes. Leveling the scope is crucial for consistent and accurate shot placement.
8. Tighten Ring Screws with Torque Wrench:
– Use a torque wrench to tighten the screws on the scope rings to the manufacturer’s specifications. Tighten the screws gradually in a cross-pattern, alternating between screws, to ensure even pressure.
9. Check for Reticle Alignment Again:
– After tightening the scope rings, recheck the alignment of the reticle. Confirm that it remains centered and aligned with the firearm’s bore.
10. Reconfirm Eye Relief:
– Ensure that the eye relief of the scope is still within the recommended specifications. Adjust the scope’s position in the rings if needed to achieve the desired eye relief.
11. Apply Anti-Seize (Optional):
– If recommended by the manufacturer, apply a small amount of anti-seize compound to the screws. This can prevent the screws from seizing over time and facilitate future adjustments.
12. Final Stability Check:
– Gently apply pressure to the scope in various directions to check for stability. Ensure that the scope is securely mounted and does not shift or rotate within the rings.
13. Secure Lens Covers (Optional):
– If your scope has lens covers, secure them in place. Ensure that they do not interfere with the operation of the scope or the mounting system.
By following these steps, you ensure that the scope is securely and accurately mounted on the firearm. A properly mounted scope is essential for achieving consistent and precise shot placement. Always refer to the manufacturer’s instructions, follow safety protocols, and conduct any necessary final checks before using the firearm with the newly installed scope.
Step 9: Level the Scope
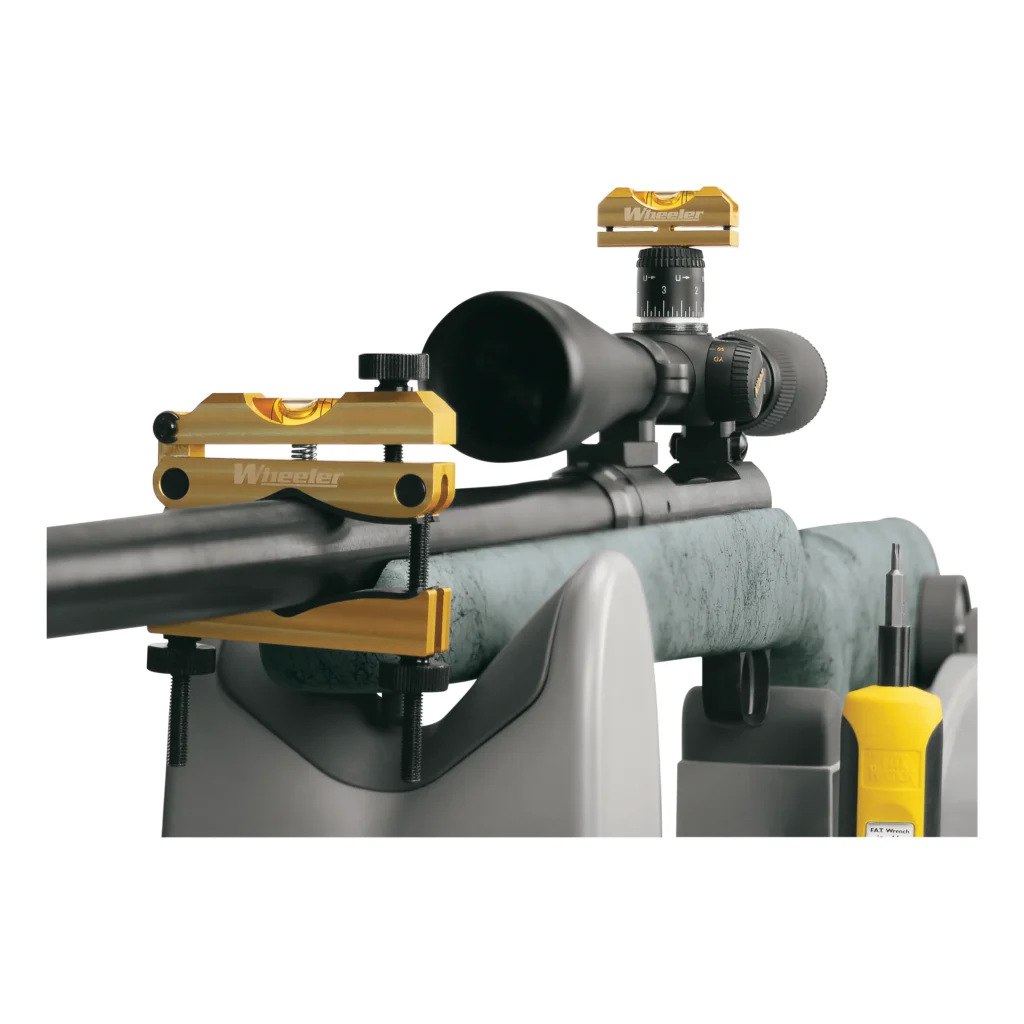
Leveling the scope is a critical step in the installation process that ensures the reticle (crosshair) is aligned with the firearm’s bore, promoting accurate and consistent shot placement. Here’s a step-by-step guide on how to level the scope:
1. Secure the Firearm:
– Before leveling the scope, ensure that the firearm is securely placed on a stable surface. If available, use a rifle vise or gunsmithing mat to provide a secure platform for the firearm.
2. Prepare the Scope:
– Remove any lens caps or protective covers from the scope to expose the reticle. Ensure that the windage and elevation turrets are set to their neutral or zero positions.
3. Place the Scope on the Mount:
– Carefully place the scope onto the mounted scope rings. Ensure that the scope is positioned correctly within the rings, centered, and leveled.
4. Insert Bubble Level:
– Place a bubble level on a flat surface of the scope, such as the turret or the flat section between the turrets. Bubble levels are designed to help you determine whether the scope is level on both the horizontal and vertical axes.
5. Adjust Scope Position:
– Adjust the position of the scope within the rings to level the bubble in the bubble level. This may involve slight movements of the scope in the rings to achieve perfect levelness.
6. Level the Firearm:
– If possible, use a separate bubble level on the firearm itself. This helps ensure that the firearm is level. This step is particularly important for long-range shooting, where even slight misalignments can impact accuracy.
7. Check for Consistency:
– Confirm that the bubble level on the scope and the bubble level on the firearm align consistently. If there is any discrepancy, make slight adjustments until both bubble levels indicate a level position.
8. Secure the Scope:
– Once the scope is leveled, hand-tighten the screws on the scope rings to secure the scope in place. Hand-tightening allows for adjustments before the final torque is applied.
9. Recheck Bubble Levels:
– After hand-tightening, recheck the bubble levels to ensure that the scope remains level. If there are any changes, make necessary adjustments before proceeding to the final tightening.
10. Torque Screws to Specifications:
– Use a torque wrench to tighten the screws on the scope rings to the manufacturer’s specifications. Tighten the screws gradually in a cross-pattern to ensure even pressure. Be cautious not to over-torque.
11. Reconfirm Levelness:
– After torquing the screws, reconfirm that the scope is level using the bubble level. Ensure that the scope has maintained its level position after the final tightening.
12. Make Final Adjustments:
– If any adjustments are needed, make them carefully at this stage. Ensure that the scope is perfectly level before completing the installation.
By leveling the scope with precision, you contribute to the overall accuracy and consistency of your shots. Always refer to the manufacturer’s instructions, use appropriate tools, and prioritize safety throughout the installation process. A properly leveled scope is fundamental for achieving optimal performance in various shooting scenarios.
Step 10: Perform Final Checks
Performing final checks is a crucial step to ensure that the entire process of installing a gun scope mount has been executed accurately and safely. These checks help confirm that the scope is securely mounted, aligned, and ready for use. Here’s a step-by-step guide on how to perform final checks:
1. Visual Inspection:
– Conduct a thorough visual inspection of the entire setup. Check for any visible issues such as loose screws, misaligned components, or damage to the firearm or scope.
2. Verify Alignment:
– Reconfirm the alignment of the scope with the firearm’s bore. Use visual cues and ensure that the reticle is centered and parallel to the barrel.
3. Check Bubble Levels:
– Verify the bubble levels on both the scope and the firearm to ensure that they indicate a level position. This ensures that the scope is properly leveled for accurate shot placement.
4. Confirm Stability:
– Gently apply pressure to the scope in various directions to check for stability. Ensure that the scope is securely mounted and does not wobble or shift within the rings.
5. Verify Eye Relief:
– Confirm that the eye relief of the scope is within the recommended specifications. Adjust the position of the scope in the rings if necessary to achieve the desired eye relief.
6. Inspect Screw Tightness:
– Check the tightness of all screws on the scope mount and scope rings. Ensure that they are securely tightened to the manufacturer’s specifications. Use a torque wrench for this if needed.
7. Test Adjustments (if applicable):
– If your scope has windage and elevation adjustments, test them to ensure that they function correctly. Verify that adjustments are smooth and have the intended impact on the reticle.
8. Test Fire (if safe and appropriate):
– If possible and safe, consider test-firing the firearm with the newly installed scope. This can help assess the practical accuracy and performance of the scope in real shooting conditions.
9. Recheck Levelness (if applicable):
– Reconfirm that the scope remains level by using the bubble level. If there are any changes, investigate and address the issue before finalizing the installation.
10. Record Important Information:
– Record relevant information such as torque settings, adjustments made, and any specific details related to the installation. This documentation can be valuable for future reference or adjustments.
11. Apply Anti-Seize (Optional):
– If recommended by the manufacturer, apply a small amount of anti-seize compound to the screws. This can prevent the screws from seizing over time and facilitate future adjustments.
12. Consult Manufacturer’s Instructions:
– Before considering the installation complete, review the manufacturer’s instructions one final time to ensure that every step has been followed correctly.
By performing these final checks, you ensure that the scope mount is securely attached, the scope is properly aligned, and the entire system is ready for use. Regularly inspect and maintain your scope mount to ensure long-term reliability and optimal performance. Always prioritize safety, adhere to manufacturer guidelines, and seek professional assistance if you encounter any issues during the installation process.
Conclusion:
Installing a rifle scope mount is a straightforward process that can greatly improve the accuracy and performance of your firearm. By following these step-by-step instructions and paying attention to safety and manufacturer guidelines, you’ll be well on your way to enjoying a more precise shooting experience. Remember to regularly check and maintain your scope mount to ensure optimal performance over time.

